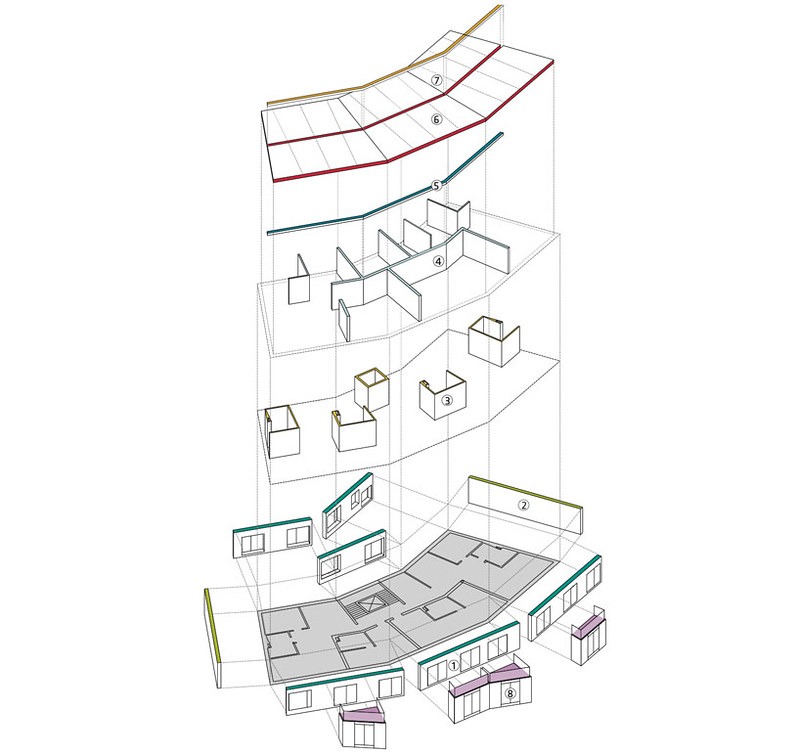
An exploded axo in Revit (or “exploded axonometric”) is a 3D visualization technique used in Revit to show the spatial relationships and component parts of a building or structure. It is similar to an axonometric projection, but with the added ability to “explode” the model by pulling apart the various elements and showing their internal structure and connections. Exploded axos are often used in construction documents, presentations, and other visual communication materials to help illustrate complex systems or assemblies in a clear and concise manner. They can also be helpful for analyzing and troubleshooting construction issues or for making design decisions.

Importance of Understanding and Using Exploded Axo in Revit
Exploded axo in Revit can be a powerful tool for visualizing and communicating the various parts and systems of a building or structure. They can help to clarify the spatial relationships and connections between different components, making it easier to understand how a building or system is put together. This can be particularly useful for professionals in the construction and design industry, as it can help to reduce the risk of errors and misunderstandings during the construction process.
Additionally, exploded axon in Revit can be an effective way to present information to clients or stakeholders, as they provide a clear and detailed view of the project. They can also be useful for generating construction documents or other technical drawings, as they show the various parts and connections in a way that is easy to read and understand.
Overall, understanding and using exploded axos in Revit can help to improve the efficiency and accuracy of the design and construction process and can enhance the clarity and effectiveness of communication and collaboration among team members.

Step-by-step to Create Exploded Axo in Revit
How do you explode elements in Revit? how to create an exploded axo view in Revit? How do you explode an isometric in Revit? Follow these steps then :
- Duplicate a 3D view and name it “Exploded 3D View Revit”
- Use the “Displace Elements” tool to move elements in the desired direction
- Use the 3D control or the “Move” tool to displace elements
- Create a “Displacement Set” by selecting multiple elements and using the “Displace Elements” tool
- Use the “Path” tool to add projection lines to show the connection between displaced elements and their original location
- Use the “Highlight Displacement Sets” tool to see which elements are part of a Displacement Set in the current view
- Use the “Reset” tool to restore displaced elements to their original location
- Use the “Visibility/Graphic Overrides” tool to control the appearance of displaced elements in the view
Video Tutorial
A video tutorial on how to create Exploded Axo in Revit Views with Displaced Elements from Black Spectacles Youtube Channel
Suggestions for further learning and resources on the topic
Here are some suggestions for further learning and resources on the topic of exploded axo in Revit:
- Autodesk Revit official documentation: The official Revit documentation provides detailed information and instructions on how to use the various tools and features related to exploded axo in Revit , including step-by-step guides and video tutorials.
- Revit tutorials and courses: There are many online tutorials and courses available that cover the topic of exploded axos in Revit in depth. These can be a great way to learn more about the subject and improve your skills.
- Revit forums and communities: There are many forums and online communities dedicated to Revit where you can ask questions and get help from other users and experts. These can be a great source of information and support for learning about Revit axonometric view and Revit displaced views and other Revit topics.
- Autodesk Knowledge Network: The Autodesk Knowledge Network is a comprehensive online resource for learning about all aspects of Revit, including exploded axos. It includes articles, tutorials, videos, and other resources to help you get started and improve your skills.
- Contact us: either by sending us a mail via this link or commenting down below, we are happy to help.


Наш сервис предлагает поддержкой иностранных граждан в СПб.
Мы помогаем в получении разрешений, регистрации, и формальностях, связанных с трудоустройством.
Наши эксперты консультируют по всем юридическим вопросам и дают советы правильный порядок действий.
Мы работаем по вопросам временного проживания, так и с гражданством.
С нами, вы сможете быстрее адаптироваться, решить все юридические формальности и спокойно жить в северной столице.
Обращайтесь, чтобы узнать больше!
https://spb-migrant.ru/