Keynotes in Revit are an important part of the design process. They can be used to focus the viewer’s attention on specific areas of a model, or to emphasize certain aspects of a model.
Furthermore, keynotes can even be used to assort and organize a specific design model of an architecture!
So, in this article, we will discuss the different types of keynotes and how they can be used in your design workflow!
What are keynotes in Revit?

Keynote lines in Revit are the backbone of your model. They are essential for creating accurate 2D and 3D drawings. Keynote lines are created when you select two or more points in your project and drag them to create a line.
Keynotes in Revit are used to create drawing views, sections, elevations, and 3D models. They can also be used as annotations to help communicate design intent. There are three types of keynotes: element keynotes, user keynotes and material keynotes!
What are the 3 different types of keynotes in Revit?
There are three different types of keynotes in Revit. These are element keynotes, user keynotes and material keynotes. Let’s learn more about them in brief below!
1. Element Keynotes
An element keynote is a type of keynote in Revit that can be applied to an entire element, such as a wall, detail component, or door. Element keynotes are similar to group keynotes, but they are specific to individual elements.
This makes them a powerful tool for creating and modifying elements. For example, you can use an element keynote to quickly change the height or width of a wall. Furthermore, you can even create groups in element keynotes.
This will help in editing an entire element selection at once when desired. Hence, this can be classified as one of the most important benefits of element keynotes!
2. User Keynotes
User keynotes are a type of keynotes in Revit that are view-specific and cannot be predefined. They can be created and edited by users, and are used to call out specific views or elements in a project. User keynotes can be placed on sheets, schedules, or views, and can be linked to other elements in the model.
3. Material Keynotes
Material keynotes are the third type of keynotes in Revit. They can be assigned to surface painted materials or materials assigned to layers of elements. The advantage of using material keynotes is that they are linked to the model and will automatically update when the model changes.
This makes it easy to change the appearance of an entire element family by changing the material assigned to the keynote.
Benefits of Keynotes in Revit!
There are many benefits to using keynotes in Revit.
- Perhaps the most obvious benefit is that keynotes provide a way to control the visual appearance of elements in your model. For example, you can use keynotes to change the colour or size of an element.
- Additionally, keynotes can be used to create animation effects.
- Another advantage of using keynotes is that they can help improve the readability of your model. For example, you can use keynotes to create text labels that are easy to see and understand.
- Finally, keynotes can be used to create presentation-quality renderings from your Revit model.
How to create custom keynotes in Revit?
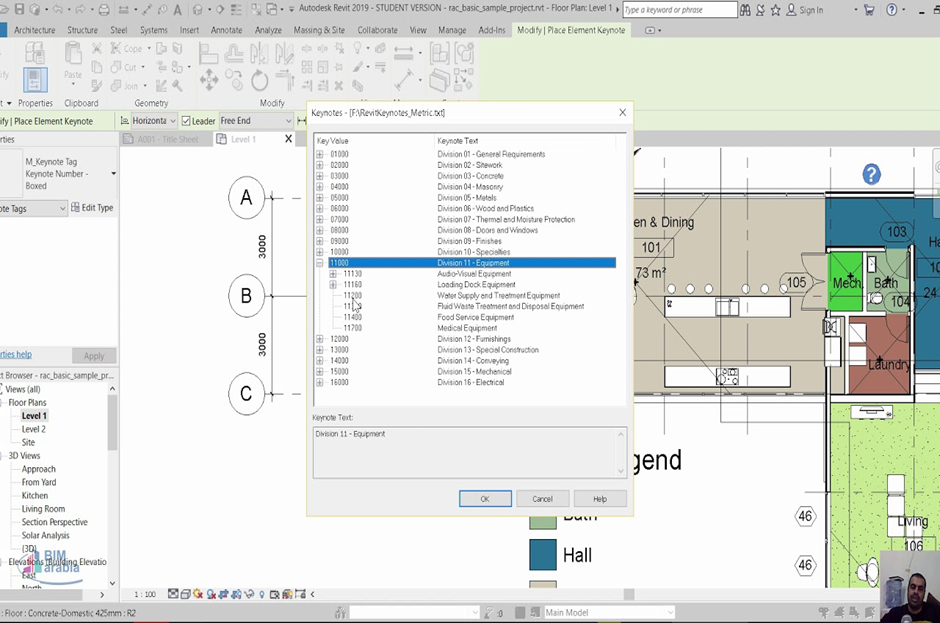
- In order to start creating custom Keynotes in Revit, you first need to open the MasterKey Palette and then select the Masterspec Keynotes node. Then, select the “Add a Keynote” icon.
- This will open up the Keynote Properties dialog box, where you can enter in your custom keynote information.
- You can then select a colour for your keynote, and decide how it will be displayed in Revit.
- Once you have finished setting up your keynote, click on the OK button to save your changes.
- You can now start using your custom keynote in any Revit views or drawings that you create.
- Keep in mind that any changes that you make to your keynote will be automatically updates in all views and drawings that contain it.
How to create a keynote schedule in Revit?

Creating a keynote schedule in Revit is a great way to keep track of your project’s milestones. To create a keynote schedule:
- Open the Revit project that you want to create the keynote schedule for.
- Go to the View tab and select Schedules from the ribbon.
- In the Schedules panel, click on Keynote Schedule.
- The Keynote Schedule dialog box will open.
- Click on Add Row at the bottom of the dialog box to add a new milestone row.
- Enter the information for the milestone row in the fields provided: a.) Milestone Name: The name of the milestone b.) Description: A brief description of what this milestone represents.
- Click OK to save your changes and close the dialog box.
What is a keynote legend in Revit?
A keynote legend is a graphical tool that allows you to display the hierarchical structure of your model in a diagram. It can be used to show the dependencies between elements in your model, or to visualize the flow of data through your model.
The keynote legend is divided into two panels: the left panel shows the top-level elements in your model, and the right panel shows the children of these top-level elements. You can control how much information is shown in each panel by adjusting the column widths.
The keynote legend is especially useful for understanding large models. By displaying the hierarchy of your model, it makes it easy to find and identify specific elements. You can also use it to troubleshoot problems with your model by identifying which element is causing a problem.
Tutorial
The Bottom Line
In conclusion, keynotes are a powerful way to add information and detail to your Revit models. They are easy to use and can be applied in a variety of ways.
By understanding the basics of keynotes, you can create more efficient and accurate models with fewer headaches. So what are you waiting for? Start using keynotes today!